User guide: looking for an opportunity
This guide shows step by step how to create your account, build and verify your skills passport, find opportunities and apply, and control your privacy. The pictures come from the platform itself, with sample data.
Download PDF1. Getting to know the platform
The home page shows what the platform offers, the newest opportunities and the parts open without an account.
1. Open the platform in any browser, on a phone or a computer. At the top: the button that switches between Arabic and English, and the light or dark button.
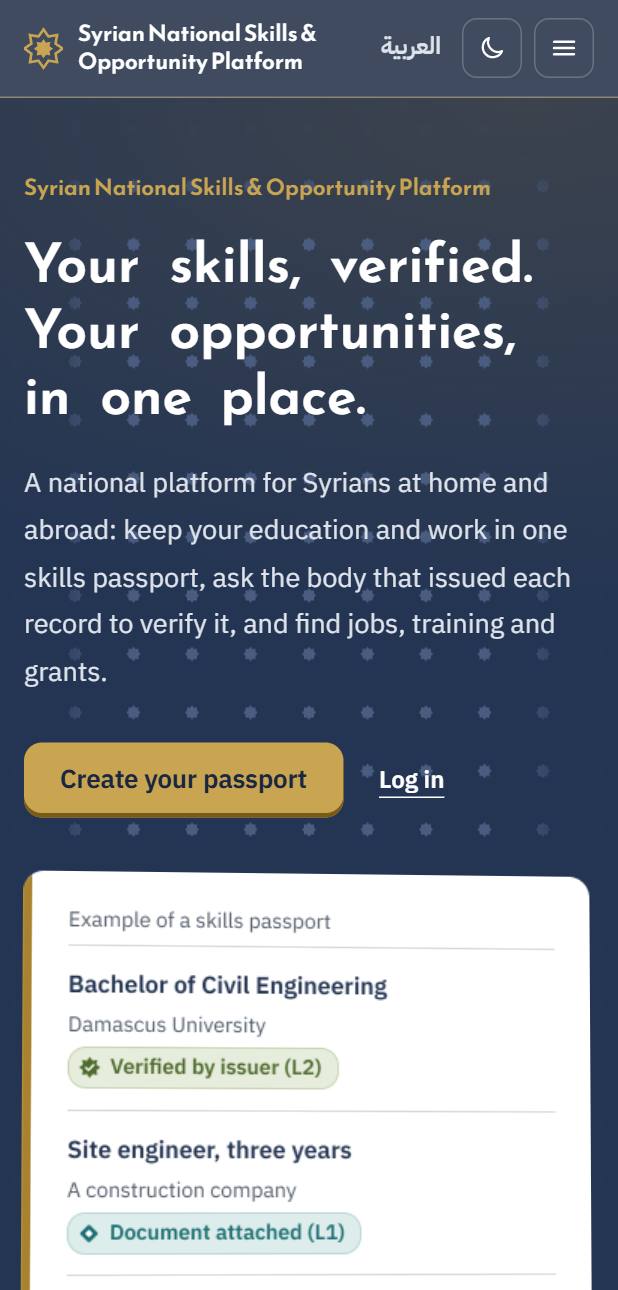
2. You can browse opportunities and courses without an account. Applying or building your passport needs one.
2. Creating an account
All you need is a mobile number you own. No email, no password.
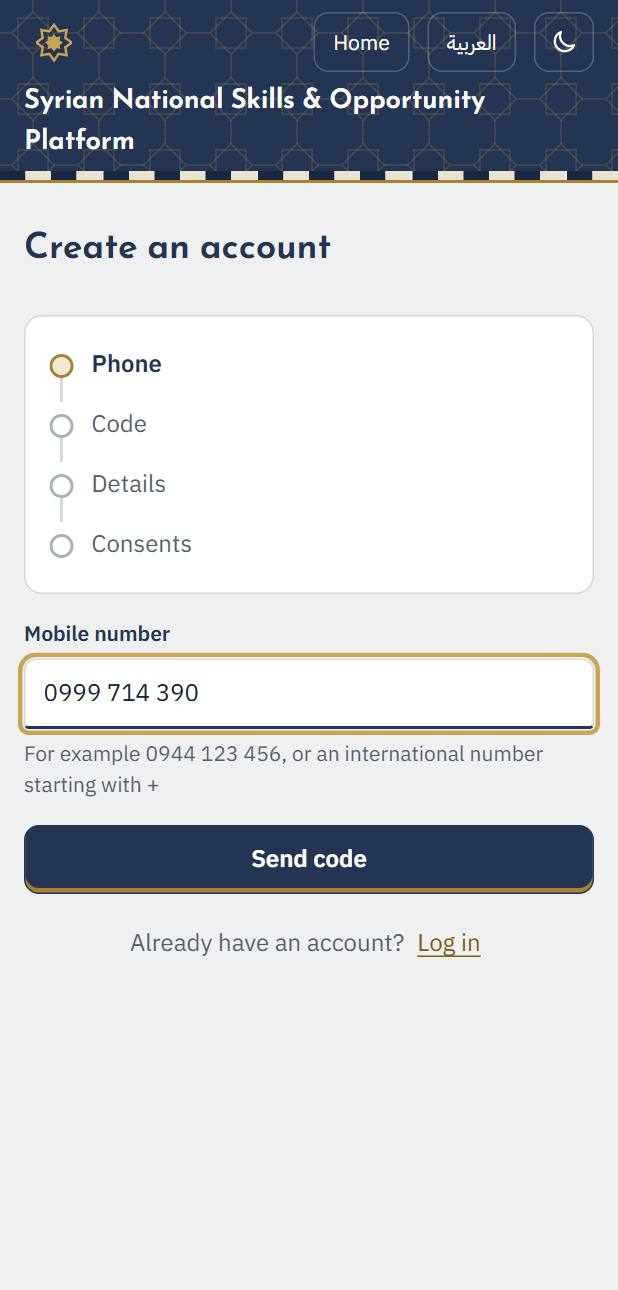
1. Choose “Create an account”, type your mobile number and press “Send code”.
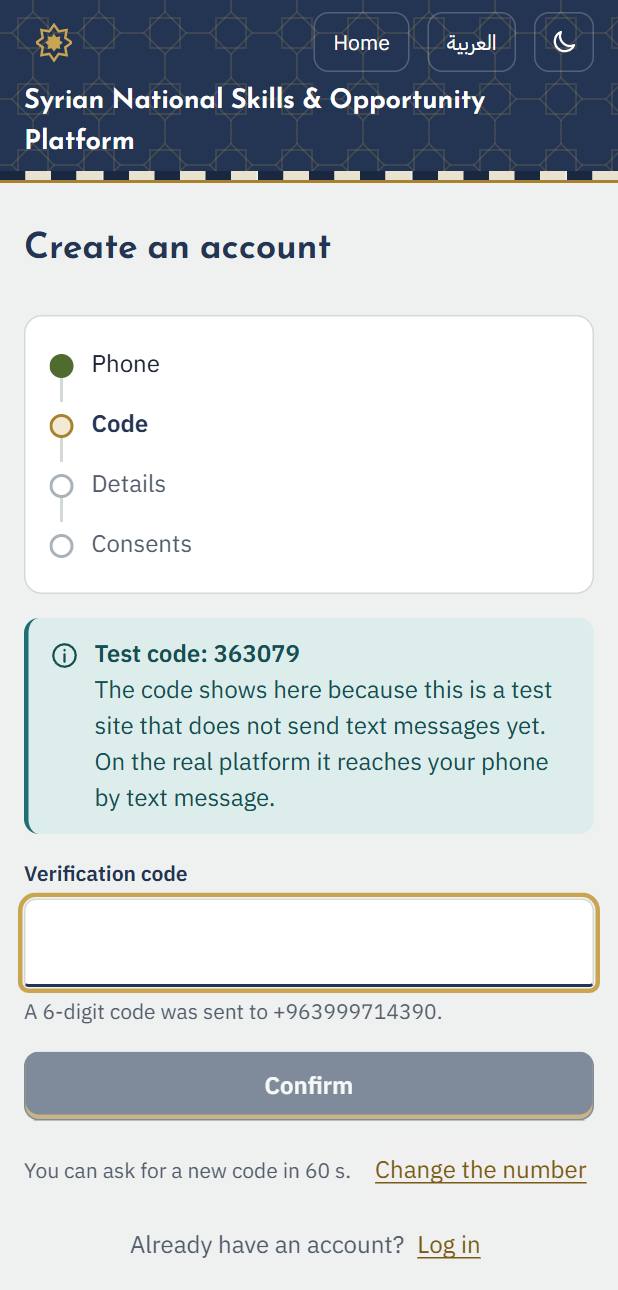
2. A text message brings a 6-digit code. Type it and it is checked by itself. If it does not arrive, ask for a new one when the countdown ends.
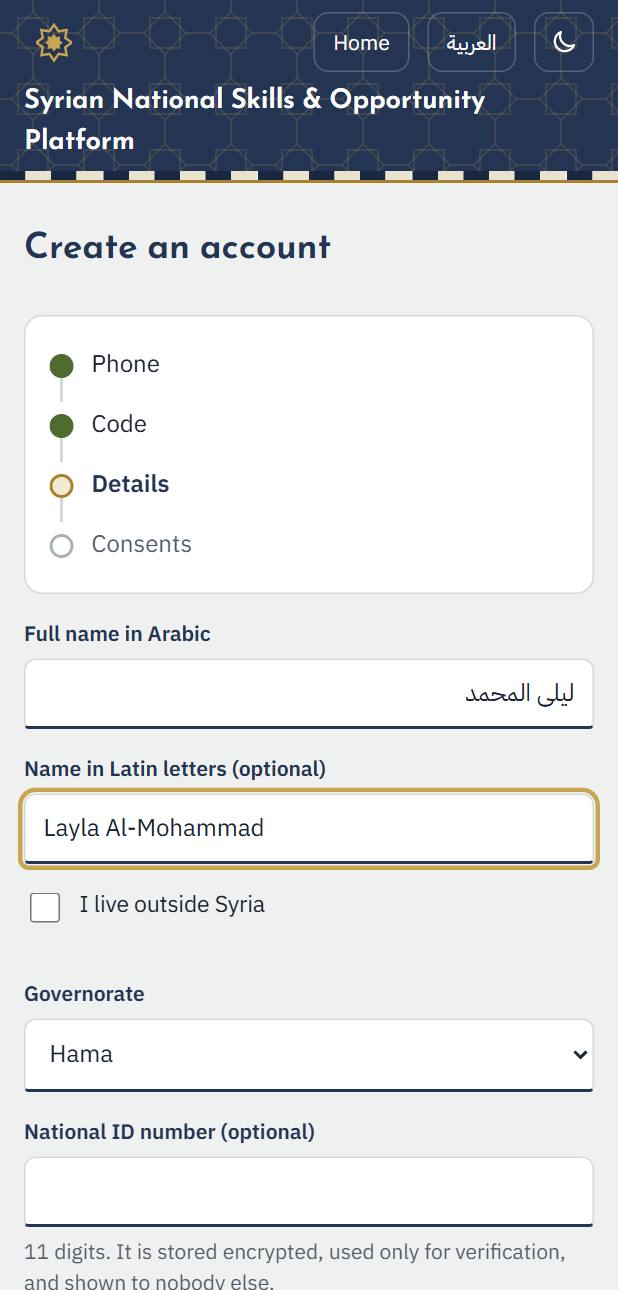
3. Type your full name in Arabic and choose your governorate, or tick that you live outside Syria. The national number and the password are optional. Then press “Continue”.
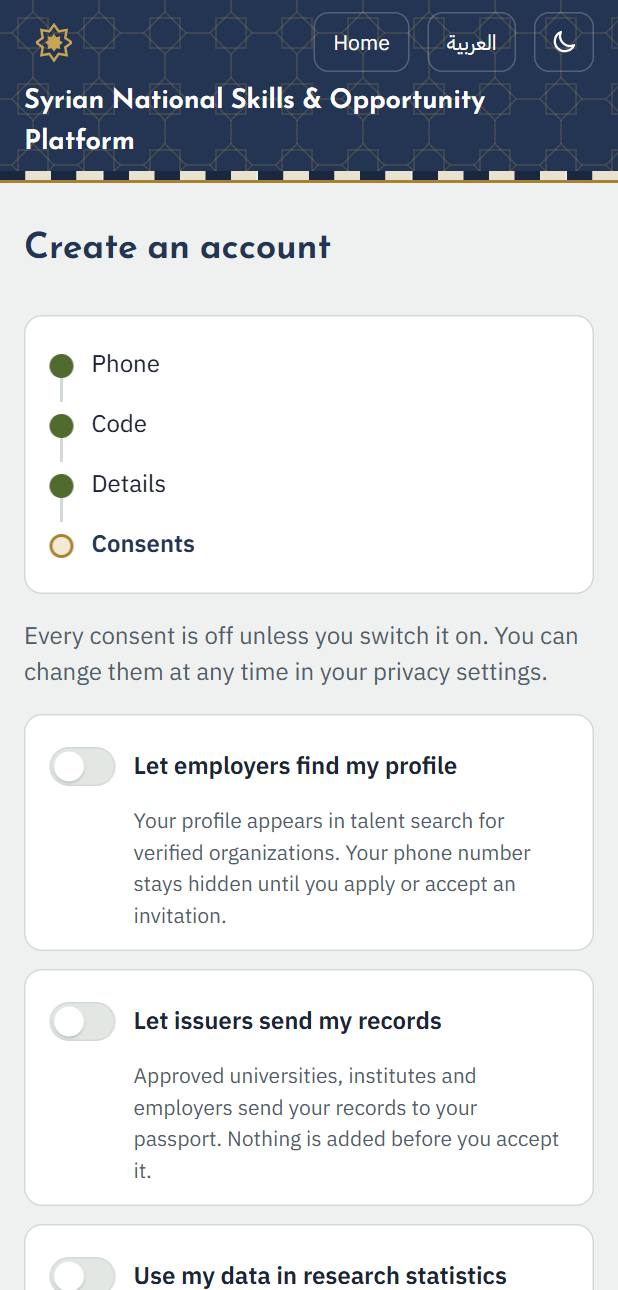
4. Choose the consents you want. All are off until you switch them on, and you can change them later. Read the terms of use and the privacy policy, accept them and press “Create my passport”.
3. Logging in
1. Choose “Log in”, type your number and then the code you receive. If you created a password, choose “Log in with a password” when text messages are slow.
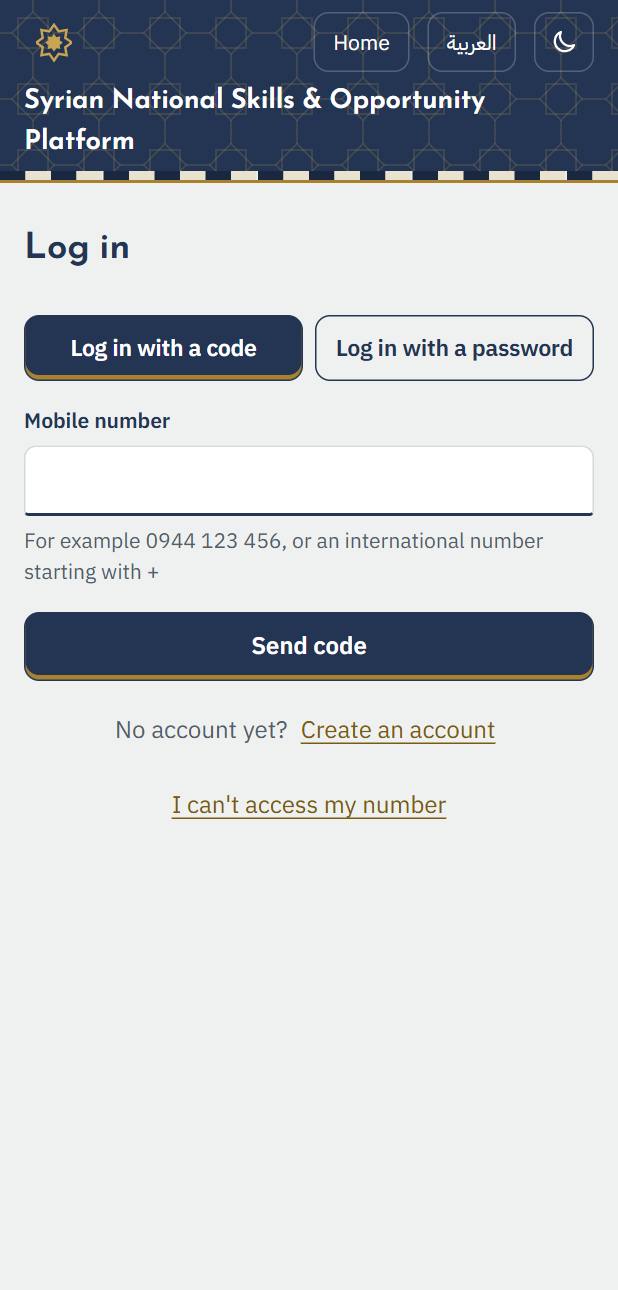
2. If you lost your old number, choose “I can't access my number” to recover your account with a new one.
4. Your dashboard
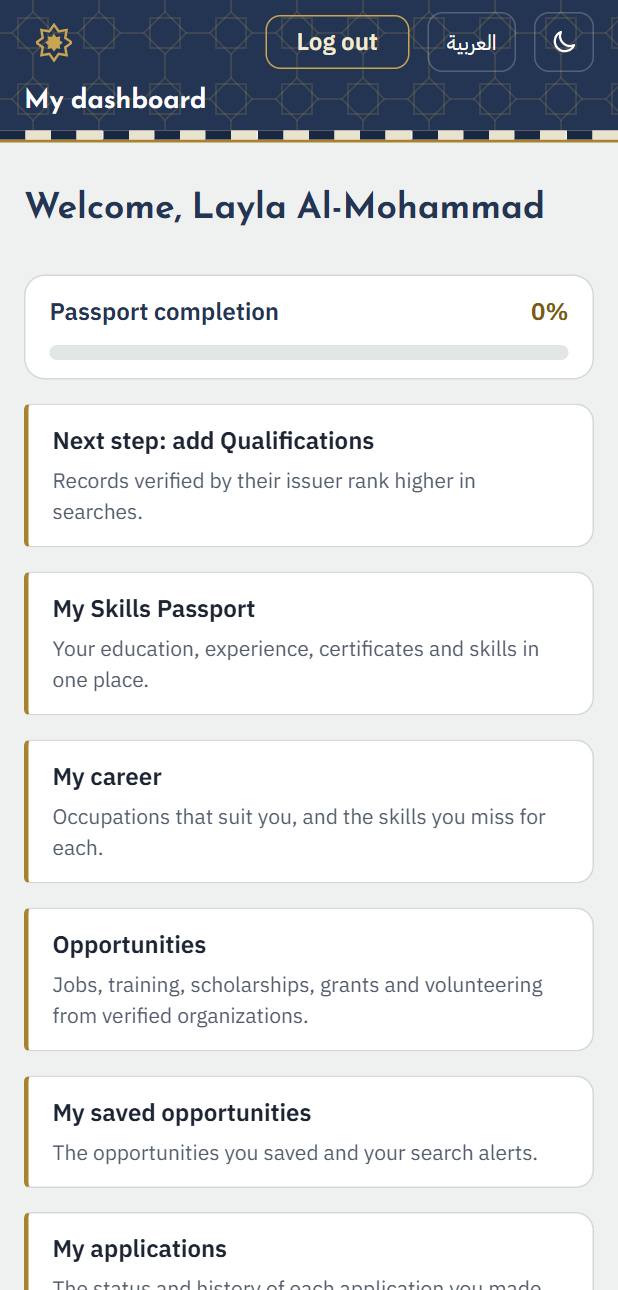
1. After logging in, your dashboard opens: how complete your passport is, the suggested next step, and a card for everything you need. Press any card to open it.
5. The skills passport
Your passport keeps your education, experience, certificates, skills and languages in one place. The more complete it is, the higher you appear in searches and the better you match opportunities.
1. Open “My Skills Passport”. The sections are empty at first; each has an “Add” button.
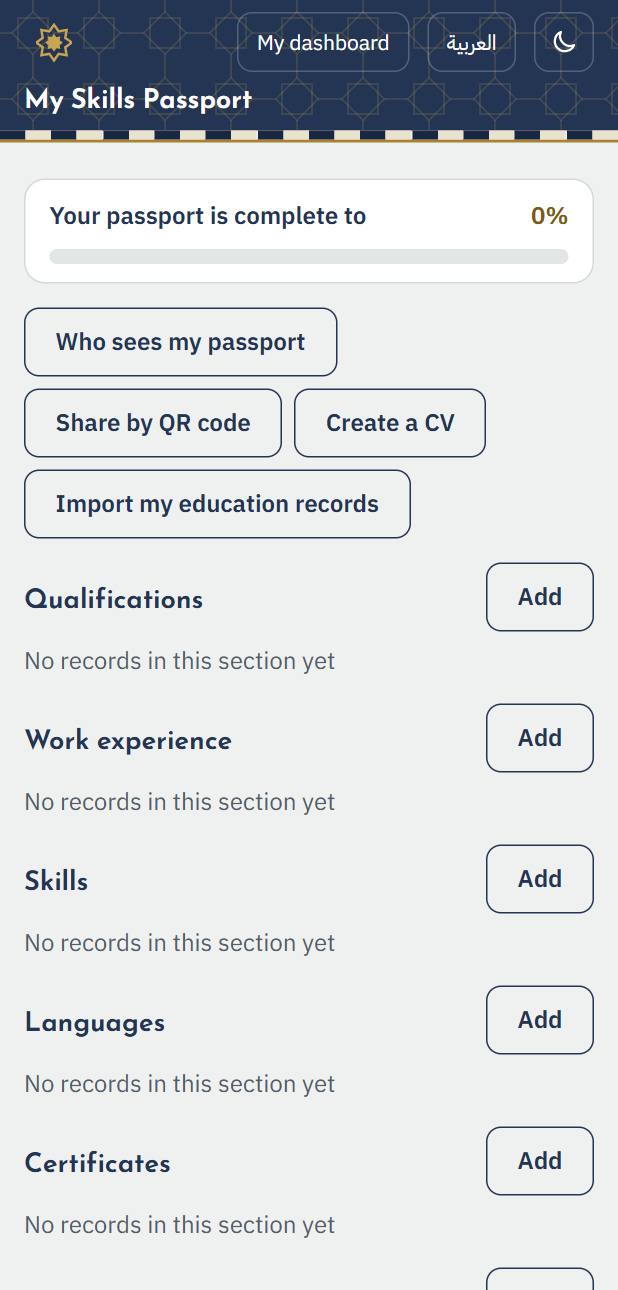
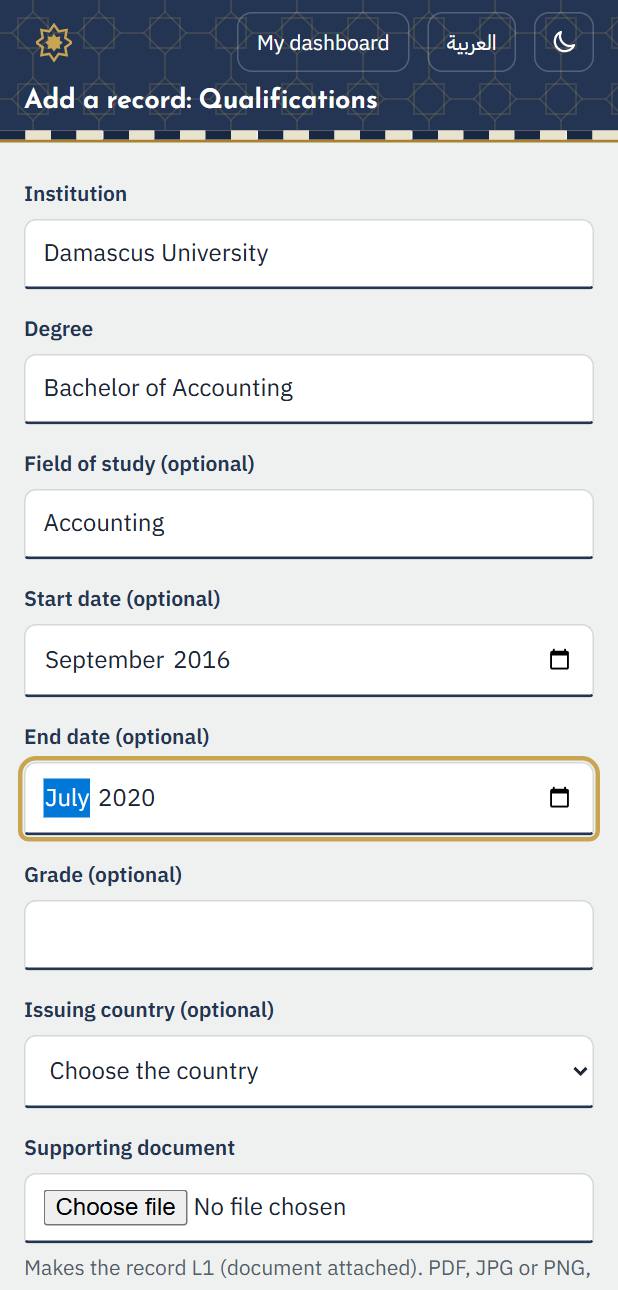
2. To add a degree: press “Add” next to qualifications, type the university, the degree and the dates, then “Save the record”. You can attach a picture of the certificate.
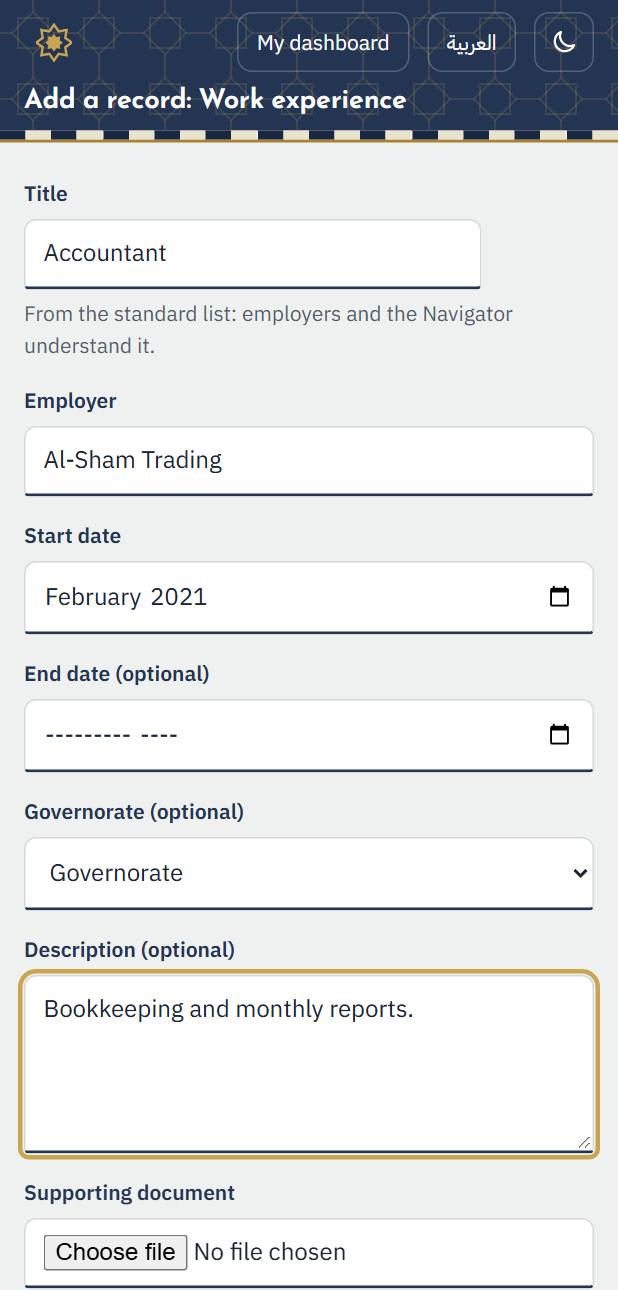
3. For experience: search for the occupation and choose it from the list, then type the employer, the start date and a short description.
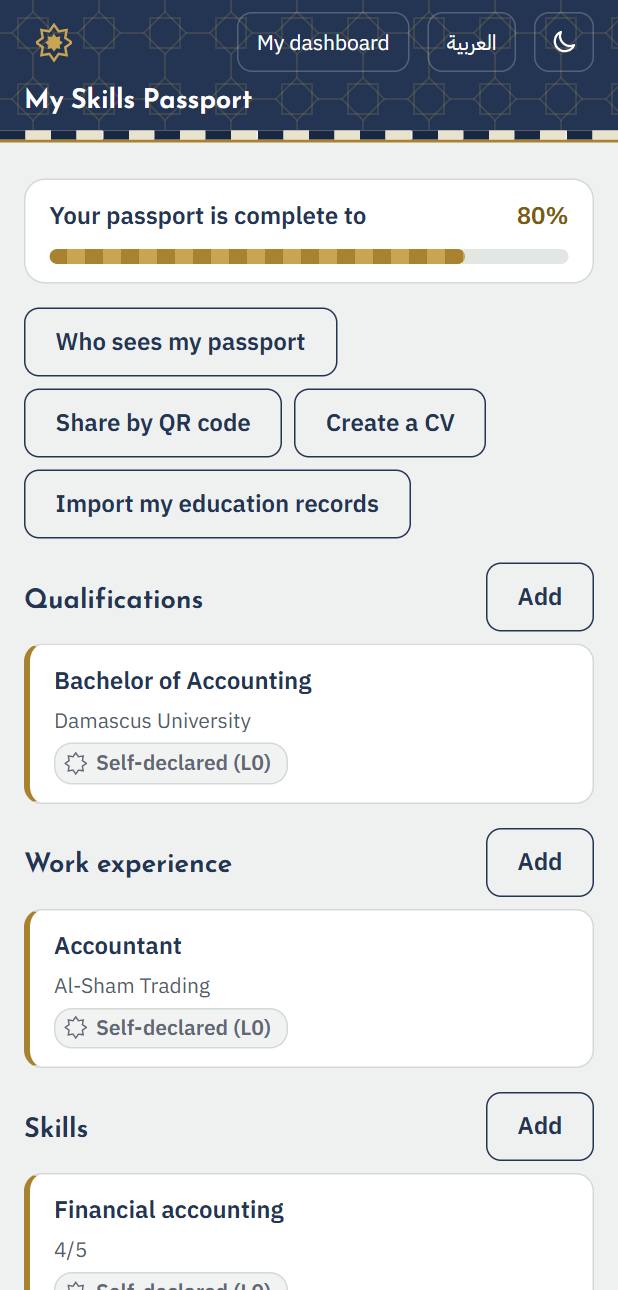
4. Add your skills (search the skills list and rate yourself out of 5) and your languages. Completeness goes up with each section.
6. Verifying a record
An example: you studied accounting at Damascus University and added the degree to your passport. Employers see it as “your own statement”, because you typed it yourself, and cannot tell whether it is true. When you ask the university to verify it, someone there checks the university's records and confirms the degree, and it shows in your passport as “verified” with the university's name, and counts in full when you are matched with opportunities. You do not need to visit the university or send papers: the whole request goes through the platform.
1. Open the record from your passport. Under “Ask for verification”, search for the organization that issued it and choose it. You see the details it will receive; your national number and phone are never sent.
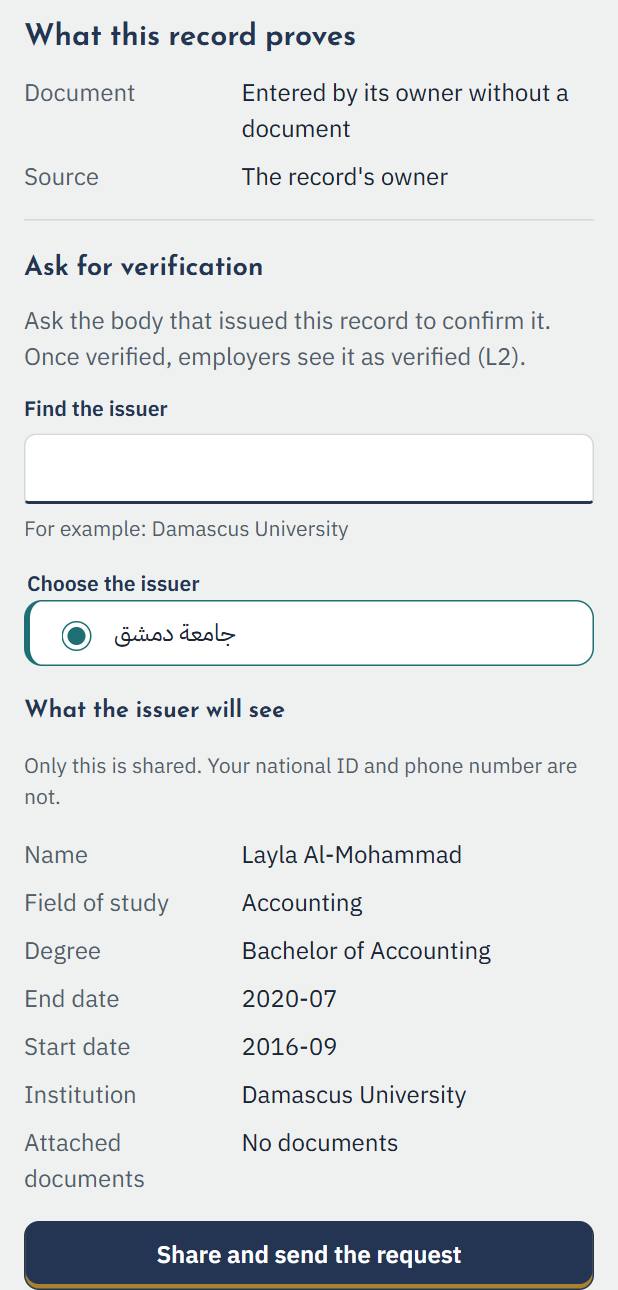
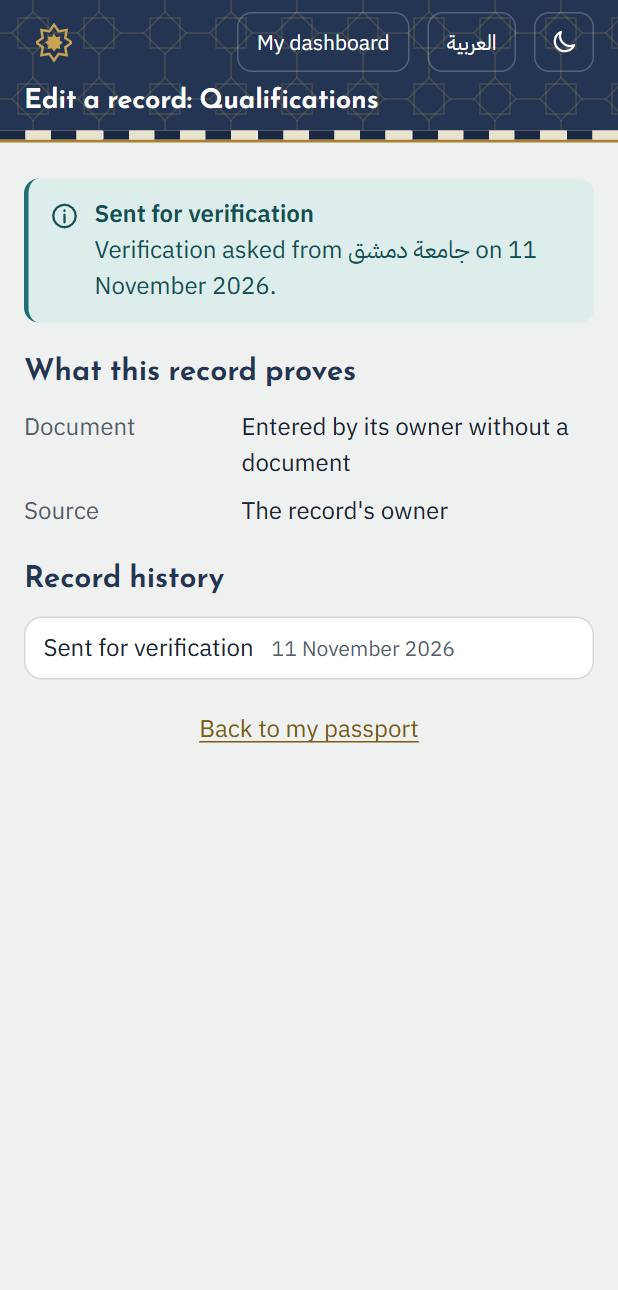
2. Press “Share and send the request”. The record shows “sent for verification” until the issuer decides.
3. When the issuer accepts, the record shows as verified, with the issuer, the date and the method, and you are notified.
7. Who sees your passport, and sharing it
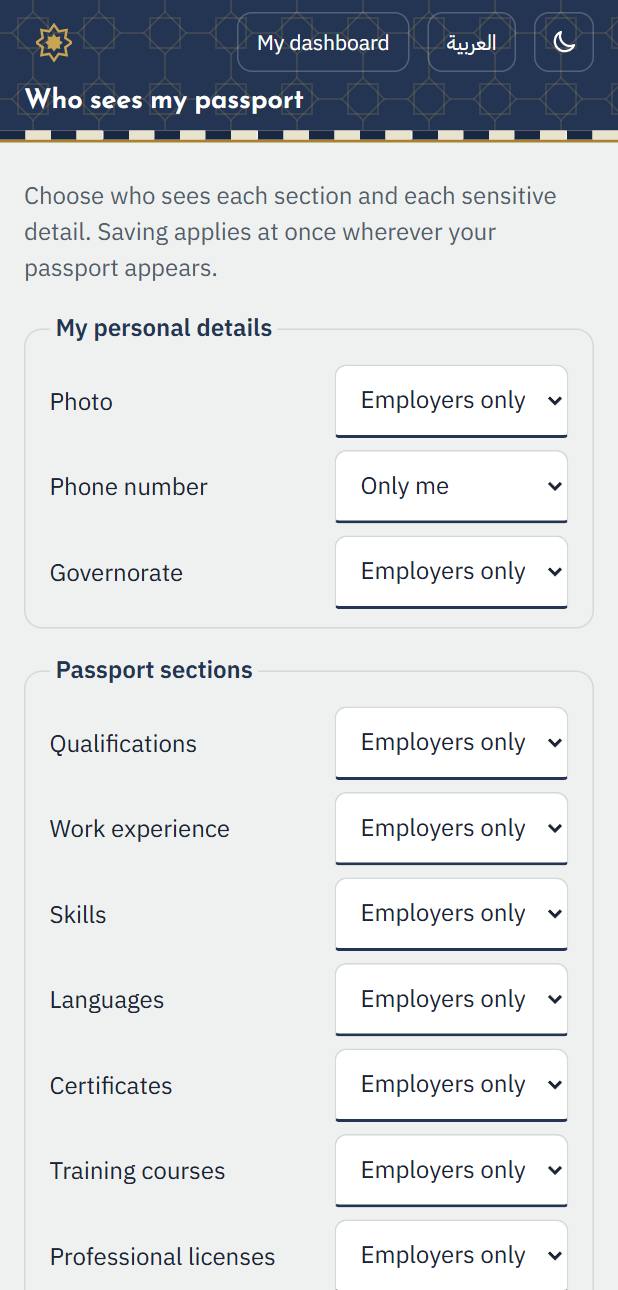
1. In “Who sees my passport” you choose what employers see of each section. Your phone number stays hidden until you apply or accept an invitation.
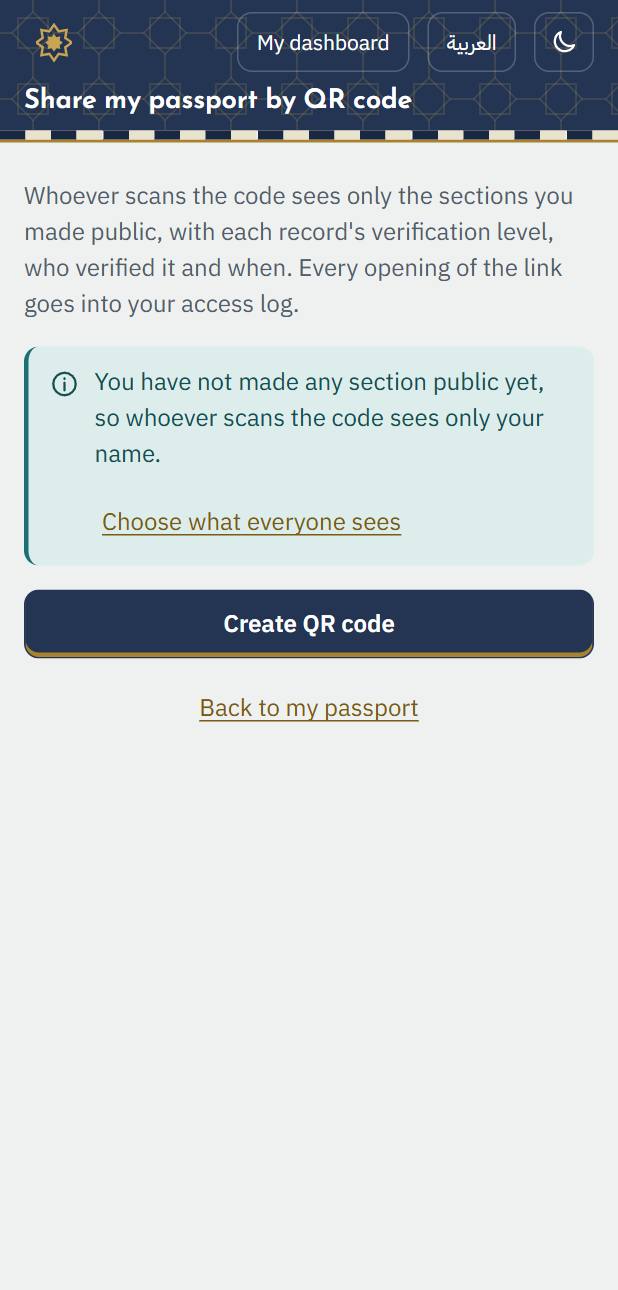
2. In “Share by QR code” you create a link or a QR code to your passport, choose what it shows and how long it lasts, and can cancel it at any time.
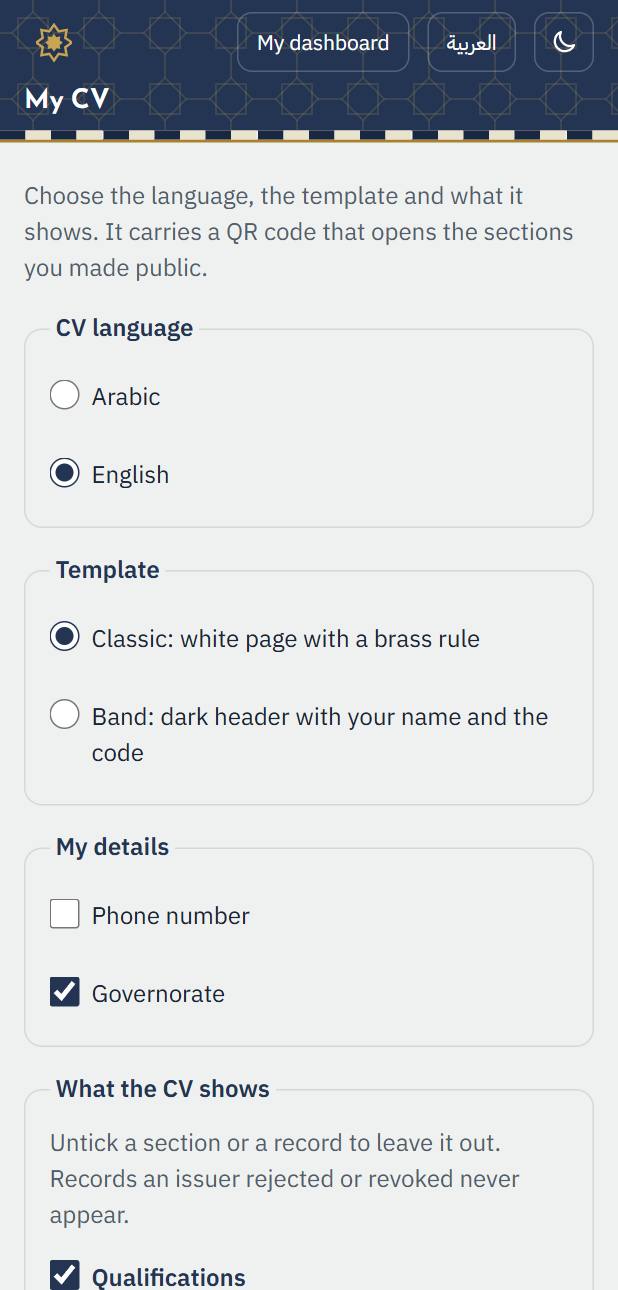
3. In “Create a CV” you make a CV from your passport and download it as a PDF.
8. Your career path
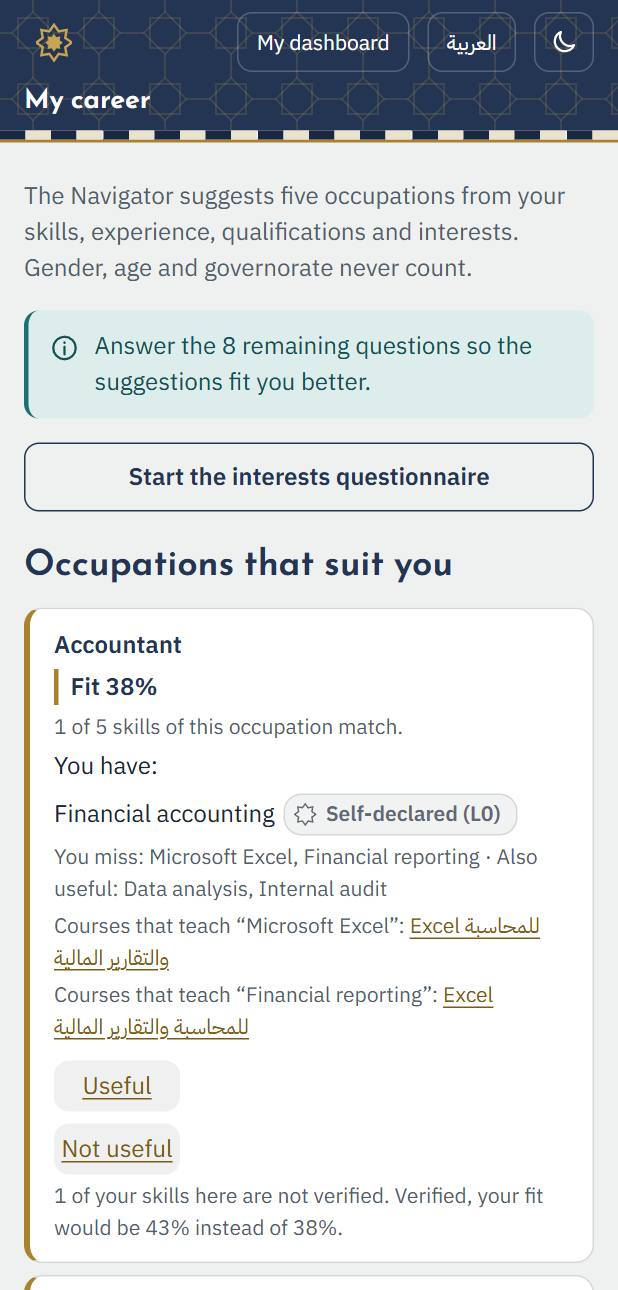
1. “My career” suggests occupations that fit your passport, shows the skills you are missing for each, and the courses that fill the gap.
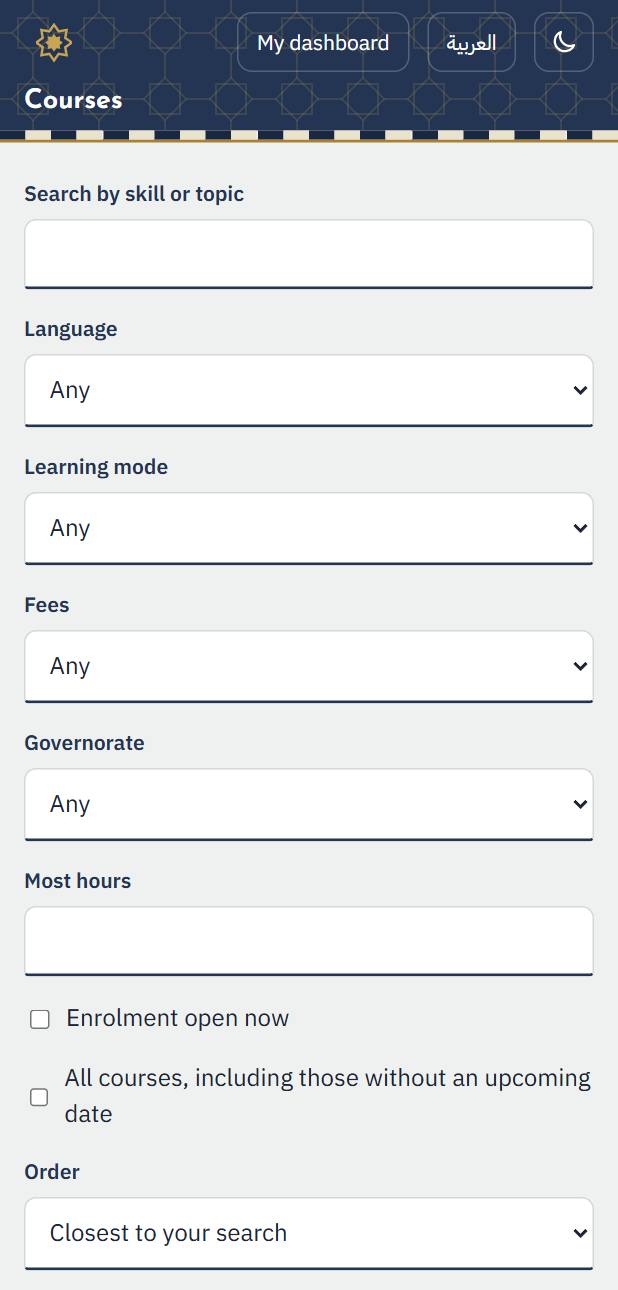
2. In “Courses” you search courses, compare them and save the ones you like.
9. Finding opportunities
1. Open “Opportunities”. Search with a word, or open “Filter the results” to choose the type, the governorate, remote work and more.
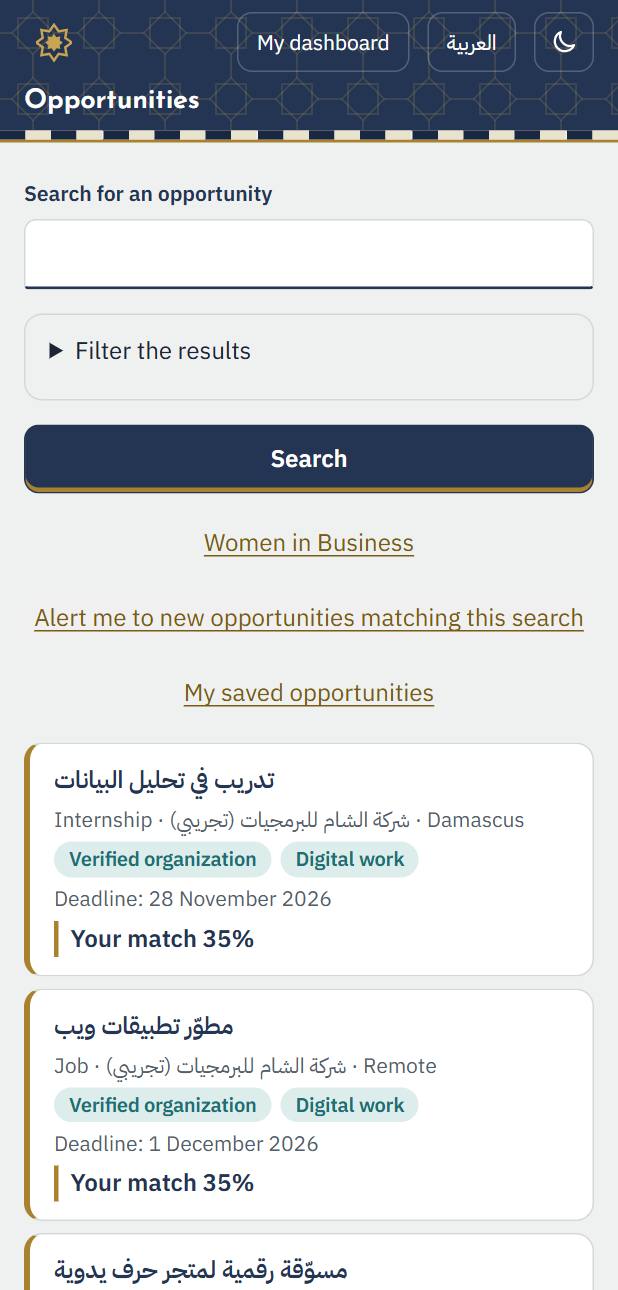
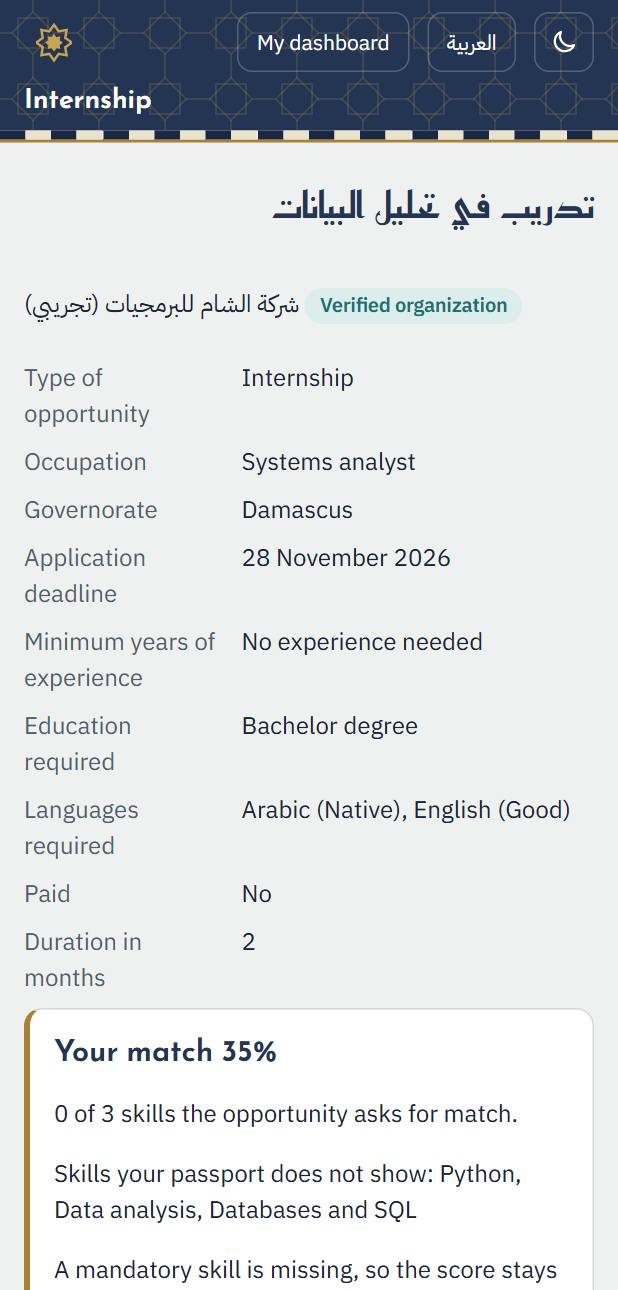
2. Open an opportunity to see its details, how well you match it and the skills your passport does not show. The score is for information only and does not decide hiring.
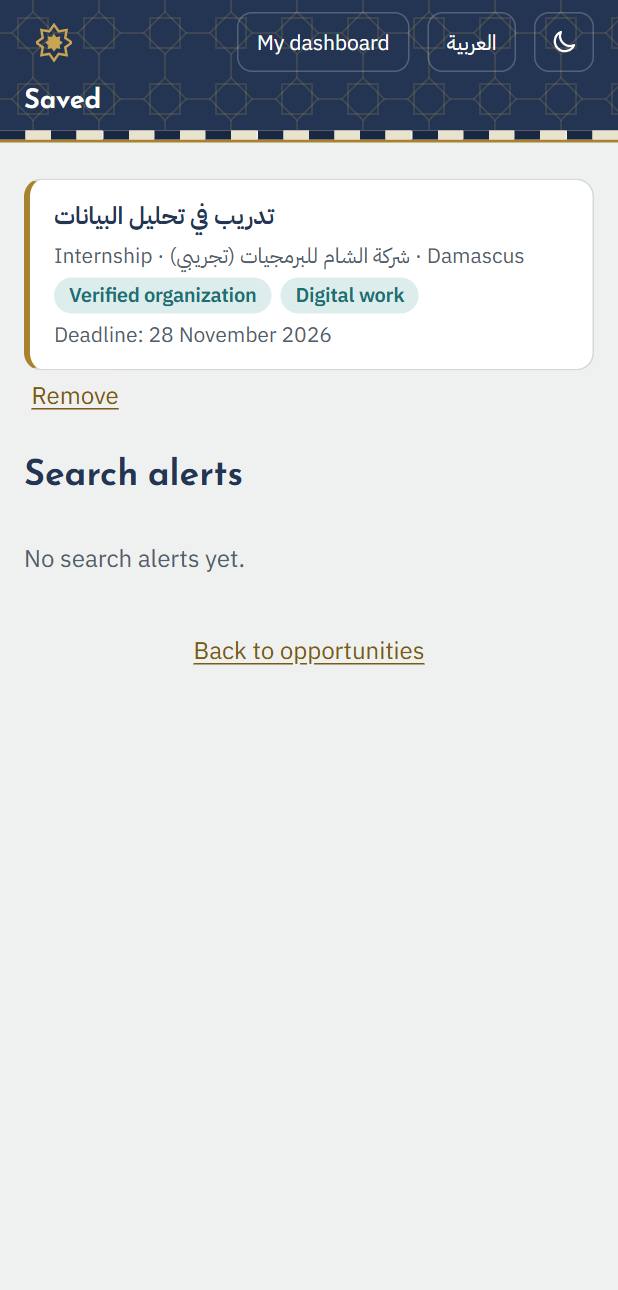
3. Press “Save opportunity” to find it later in “My saved opportunities”. From the search page you can also ask to be alerted when new opportunities match your search.
10. Applying
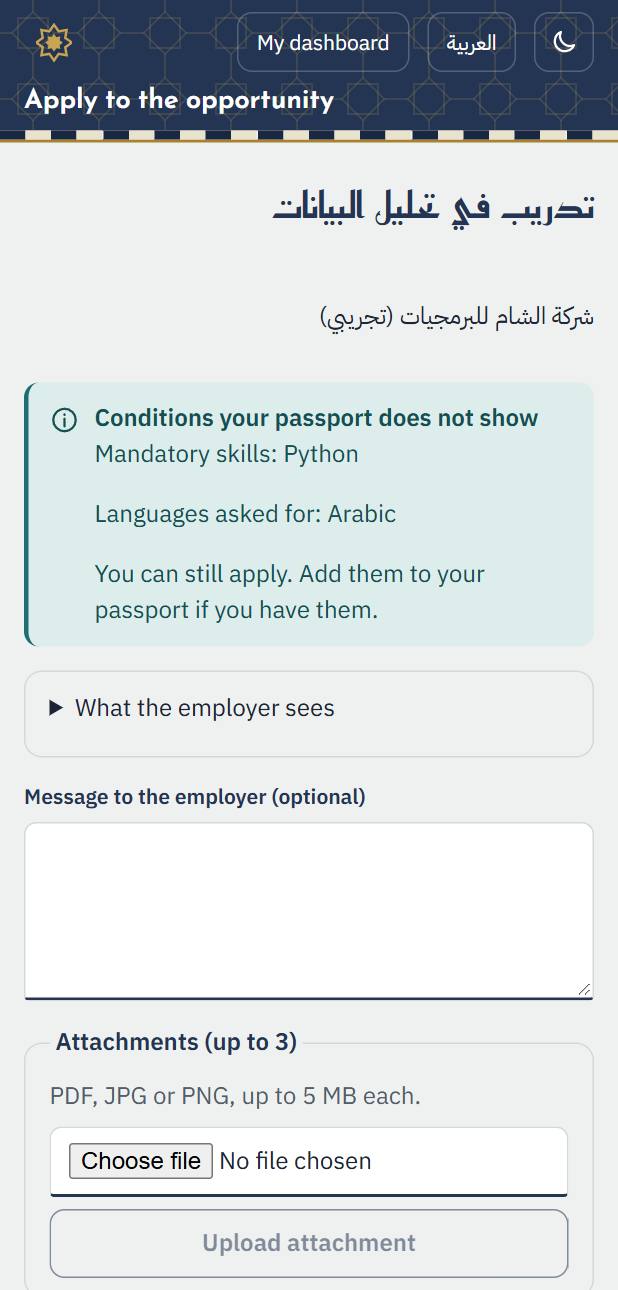
1. On the opportunity's page press “Apply now”. You see the requirements your passport does not show and what the employer will see of it. Write a short message if you like and attach files.
2. After sending, your application's page opens: its stages and their dates (submitted, reviewed, shortlisted, interview...). You are notified at each change.
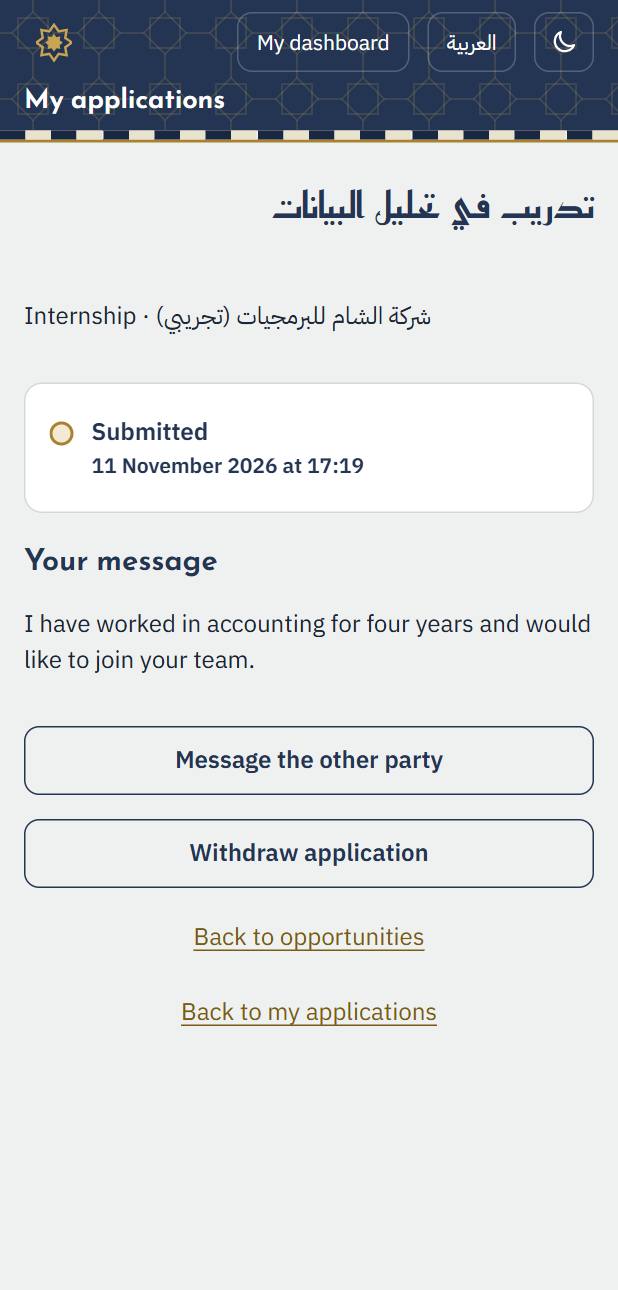
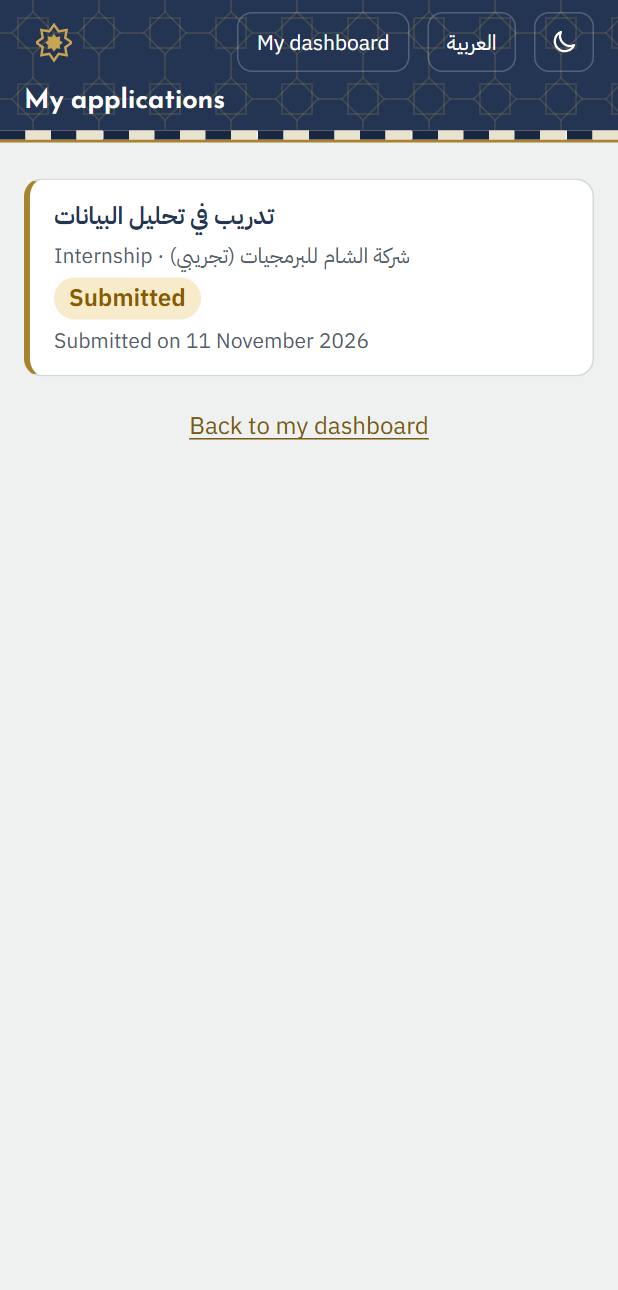
3. All your applications are in “My applications”. You can withdraw one from its page with “Withdraw application”; the employer is told.
11. Notifications and messages
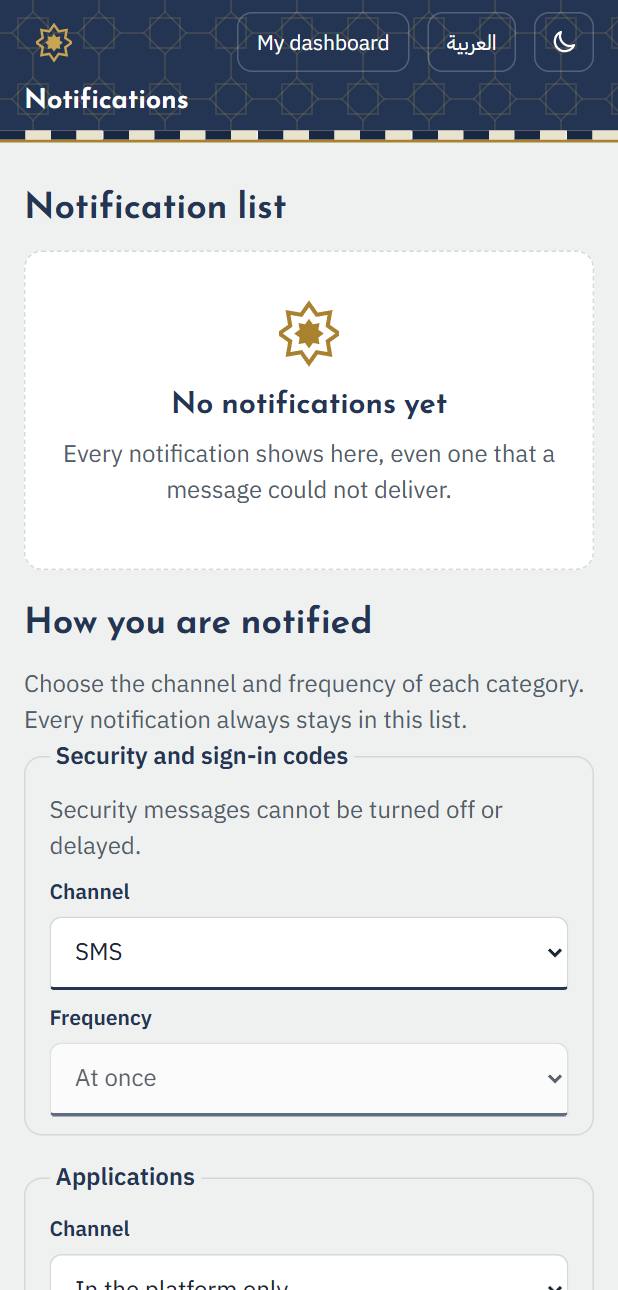
1. “Notifications” gathers what concerns you: an application's new stage, a verified record, a new message. In the settings you choose what reaches you and how.
2. Write to the employer from your application's page with “Message the other party”. You can block anyone or report an abusive message.
12. Privacy and security
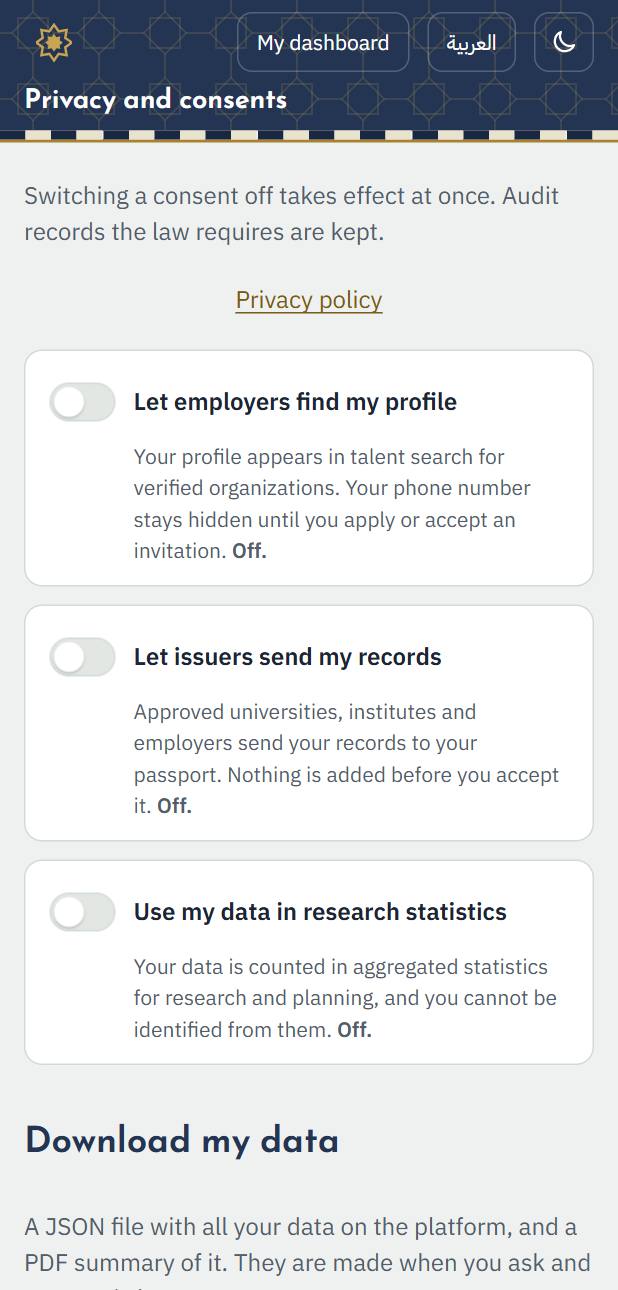
1. In “Privacy and consents” you switch each consent on or off (switching off takes effect at once), download a copy of all your data, or delete your account.
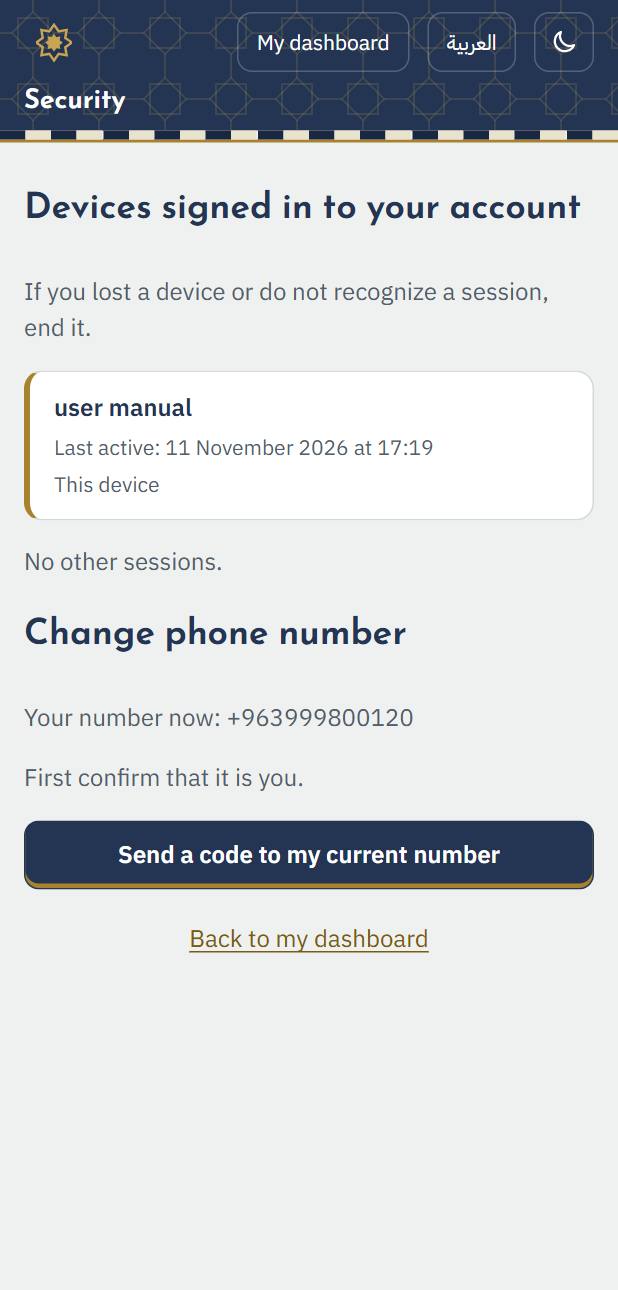
2. In “Security” you change your mobile number or password, and see the devices you are signed in on and end their sessions.