User guide: issuers and verification
When your organization confirms that a degree or an experience is genuine, the record becomes “verified” (L2) in its owner's passport and counts in full with employers. This guide shows how to receive verification requests and decide them, verify a whole batch with a file, and handle disputes.
Download PDF1. Working as a verifier
Your organization registers on the platform as in the organizations' guide, and the platform administrator sets, when approving it, the kinds of records it may verify. The owner then invites verifiers with the role “Verifier”.
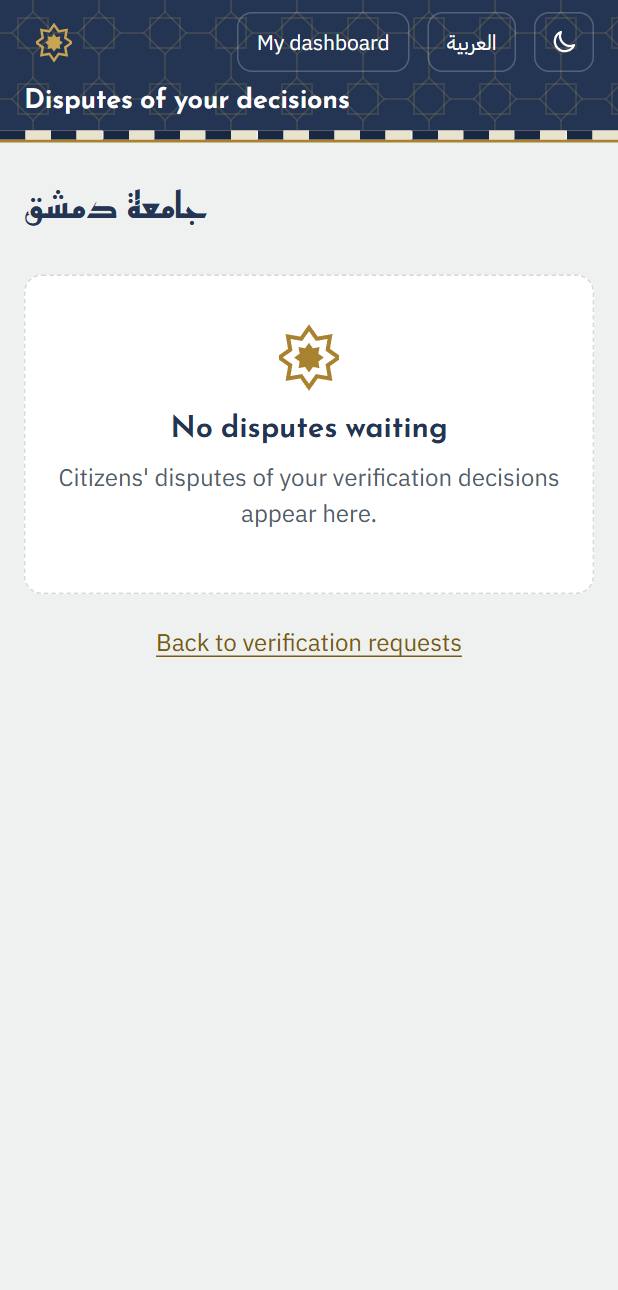
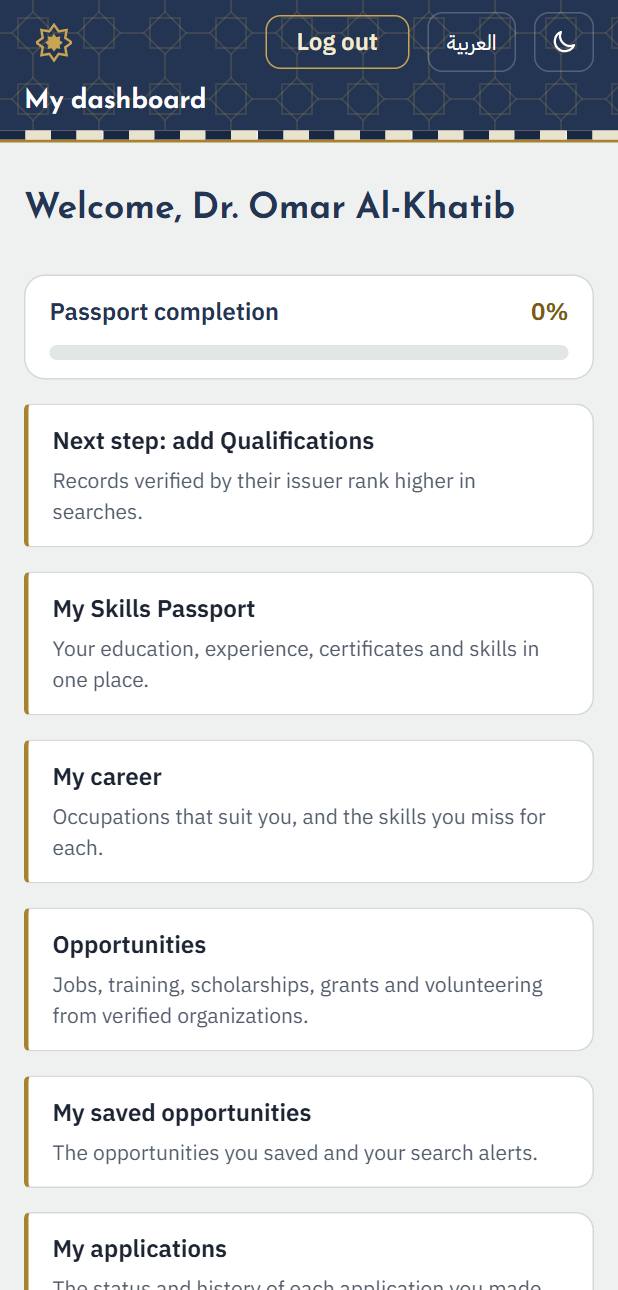
1. Choose the role “Verifier” under “My roles” on your dashboard. This role needs an authenticator app on your phone. Cards appear for verification requests, file import, verified records and disputes.
2. Verification requests
1. “Verification requests” shows the requests sent to your organization, oldest first. Press a request to open it.
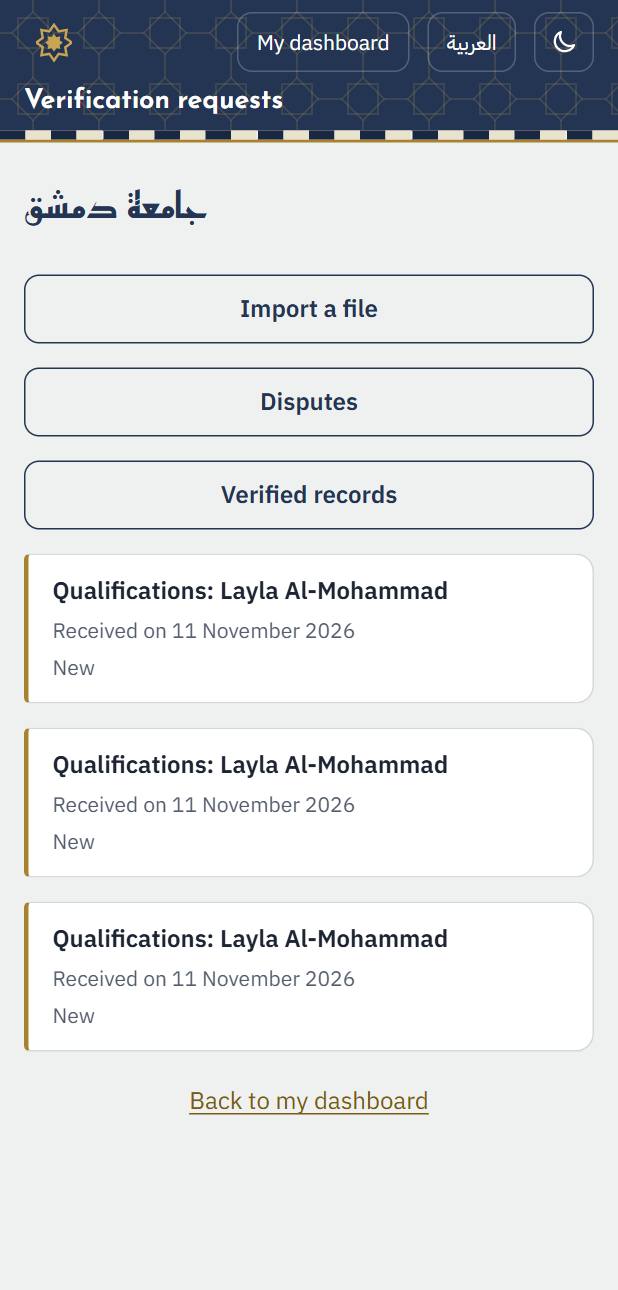
2. The request shows the record as its owner entered it and the attached documents. You never see their national number or phone.
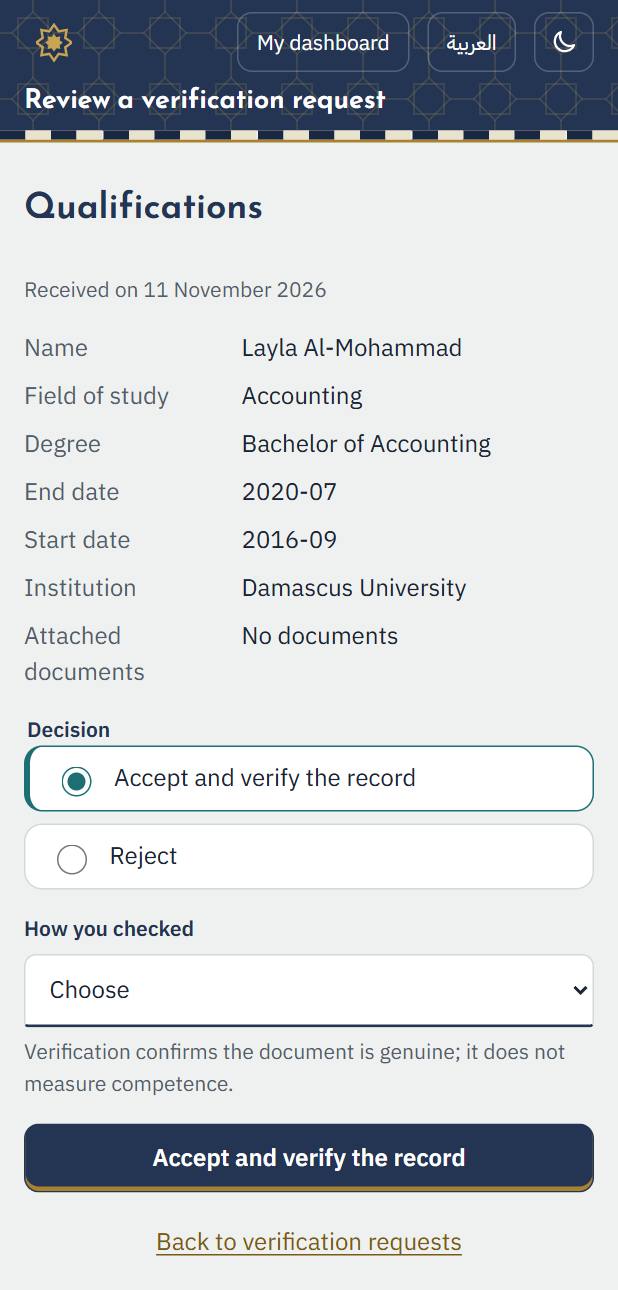
3. To accept: choose how you checked it (matched against your records, saw the original document, or confirmed directly), then “Accept and verify the record”. To refuse: choose the reason, which the owner sees.
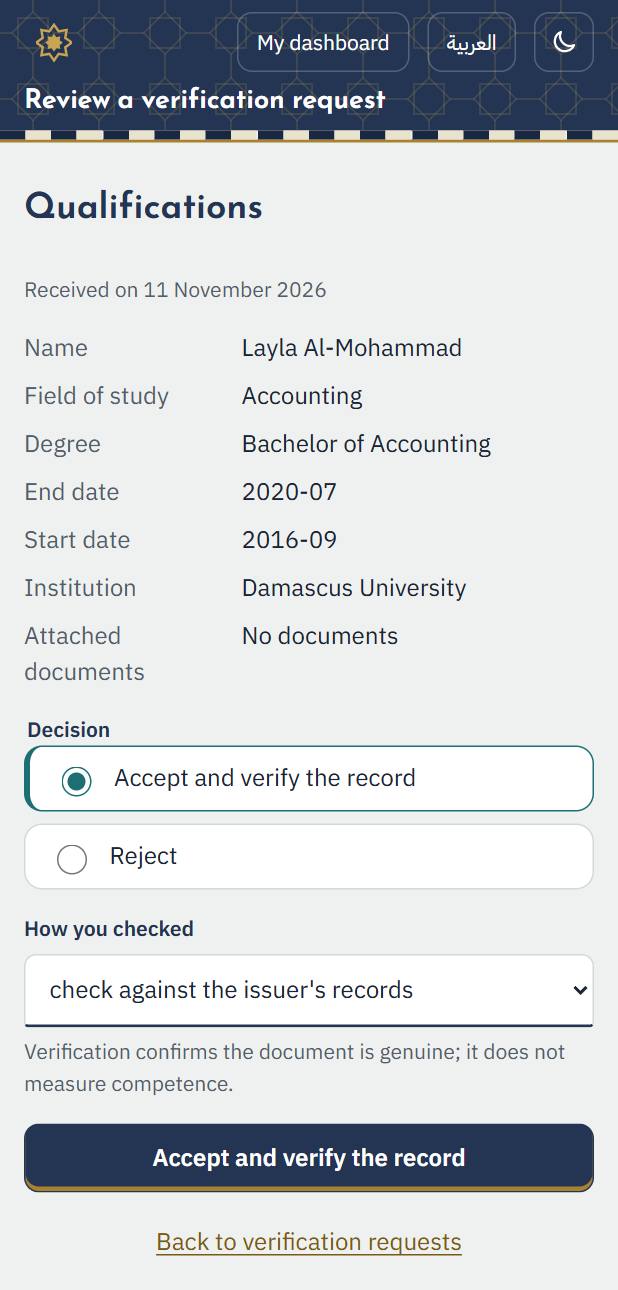
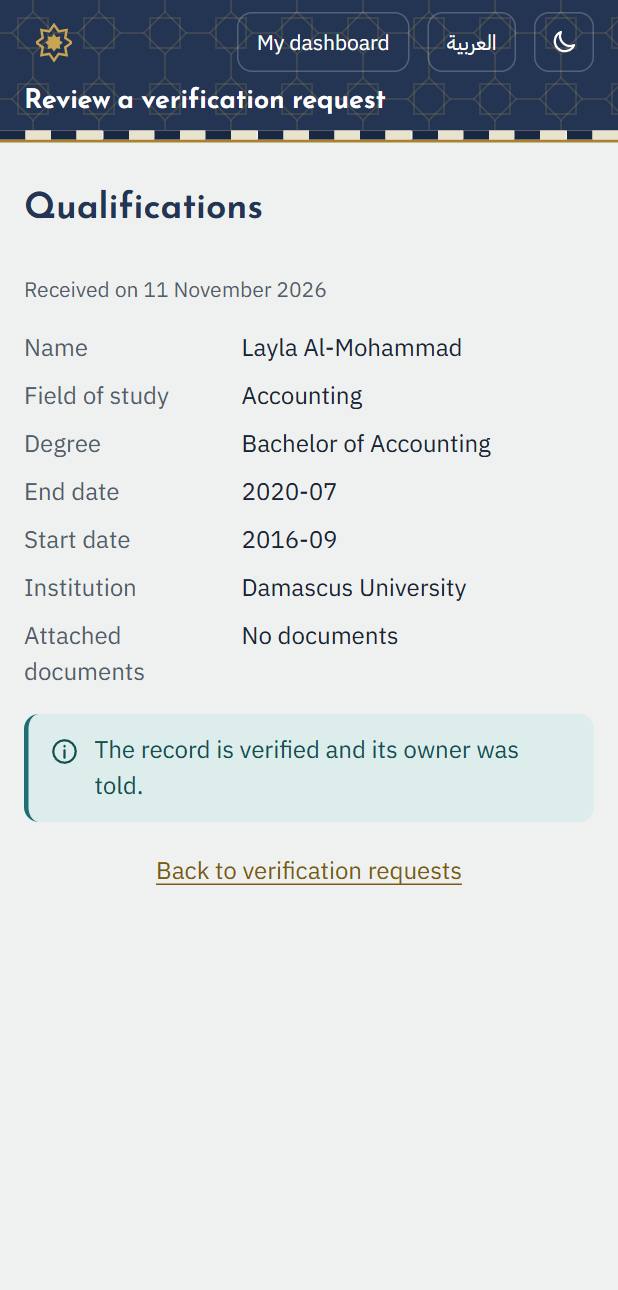
4. The decision is saved and the owner is told. An accepted record shows in their passport as verified, with your organization's name and the date.
3. Verifying with a file
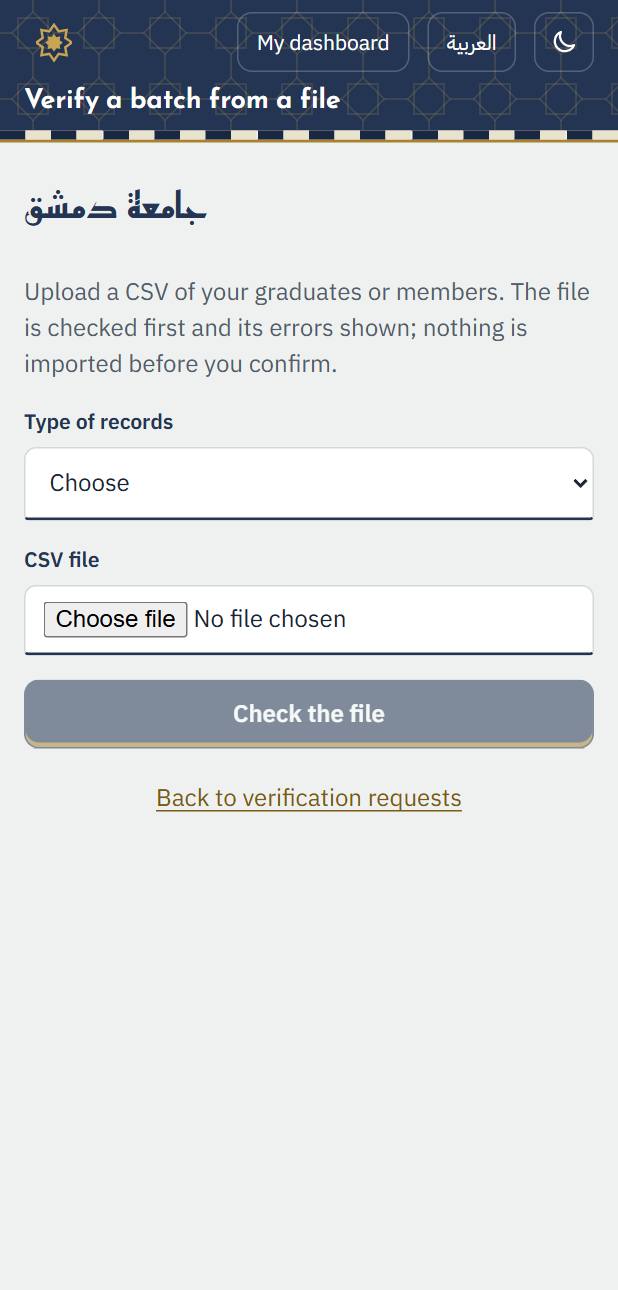
1. In “Import a file”, download the template, fill it with your graduates' or members' records (national number, name and the record's details), then upload it. Each row is matched to its owner, who receives the record to accept before it is added to their passport.
4. Verified records and disputes
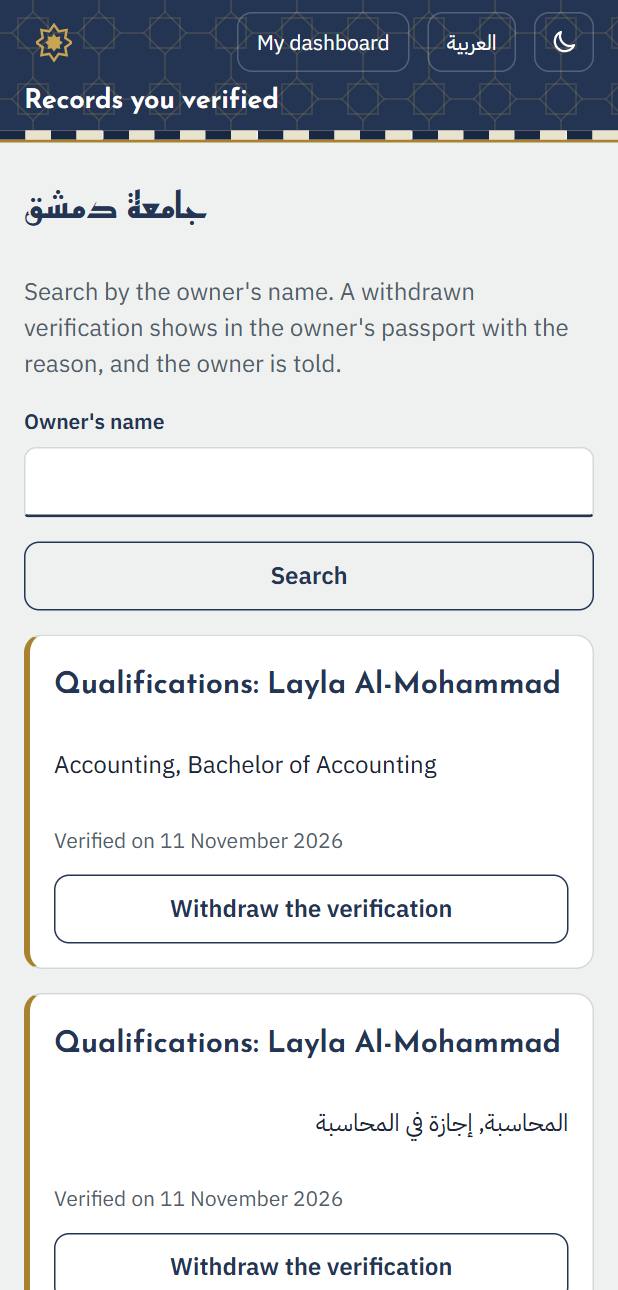
1. “Verified records” gathers everything your organization verified. Search by name or reference number; you can withdraw the verification of a record found to be wrong, giving the reason.
2. “Disputes” shows owners' disputes about a record your organization sent or verified. Study them and decide: correct the record, or keep it and explain why.